Course Planning
The course planning component of the Enrollment Forecasting and Planning (EFP) tool in FAST Student can be used to:
-
Plan or schedule courses for a future term based on current or forecasted enrollment
-
Assign instructors to courses
-
Manage faculty workload (expected vs. actuals
-
Assign faculty types, categories, etc. to faculty for future terms
-
Generate basic course plans for use in enrollment forecasting
To utilize the course planning feature of the Enrollment Forecasting and Planning (EFP) tool in FAST Student, you must first be assigned the role of "Student-Course Plan Administrator" via the Admin User/Role Assignment settings.
Additionally, before using the course planning feature, it is recommended that you set up institutional definitions with your leadership team that align with your ERP System. For example, it is a good idea to decide on what identifies a student as retained, graduated, applied, eligible to enroll, enrolled, etc. It is also recommended that your term-to-term course plan has already been rolled into the new year. It will make it easier to create a new course plan.
Create and Manage Course Plans
First, in the FAST Student application, select Course Planning from the menu. On the drop-down menu, choose Course Plans and then Create and Manage Course Plans.
On the page that opens, create a new record and name your course plan. This can be created for a full academic year or on a term-by-term basis. Keep in mind that different course plans can be combined into a final forecast.
To get started, click the NEW button and give your new plan a title. Feel free to add comments in the Comments column as needed and make sure to check the box in the Enabled column so that other collaborators can see your course plan.
Under the Course Approval Queue column, select the desired approval queue option. This is an important step that will allow for implementation of the course plan by moving it through the required channels of approval for final updating by the Registrar in the ERP System. There is also an option to use the same or different approval queue to make changes for faculty via the Faculty Change Approval Queue including things like full/part time status or tenure track ranks.

Once the approval queue options are selected, it is possible to provide additional users with access to the course plan. Everyone who has the course plan administrative role can edit the course plan, but via the Edit Roles column, you can also assign additional edit or view roles.
When you are satisfied with your course plan settings, click the Save icon.
Populating Course Plans
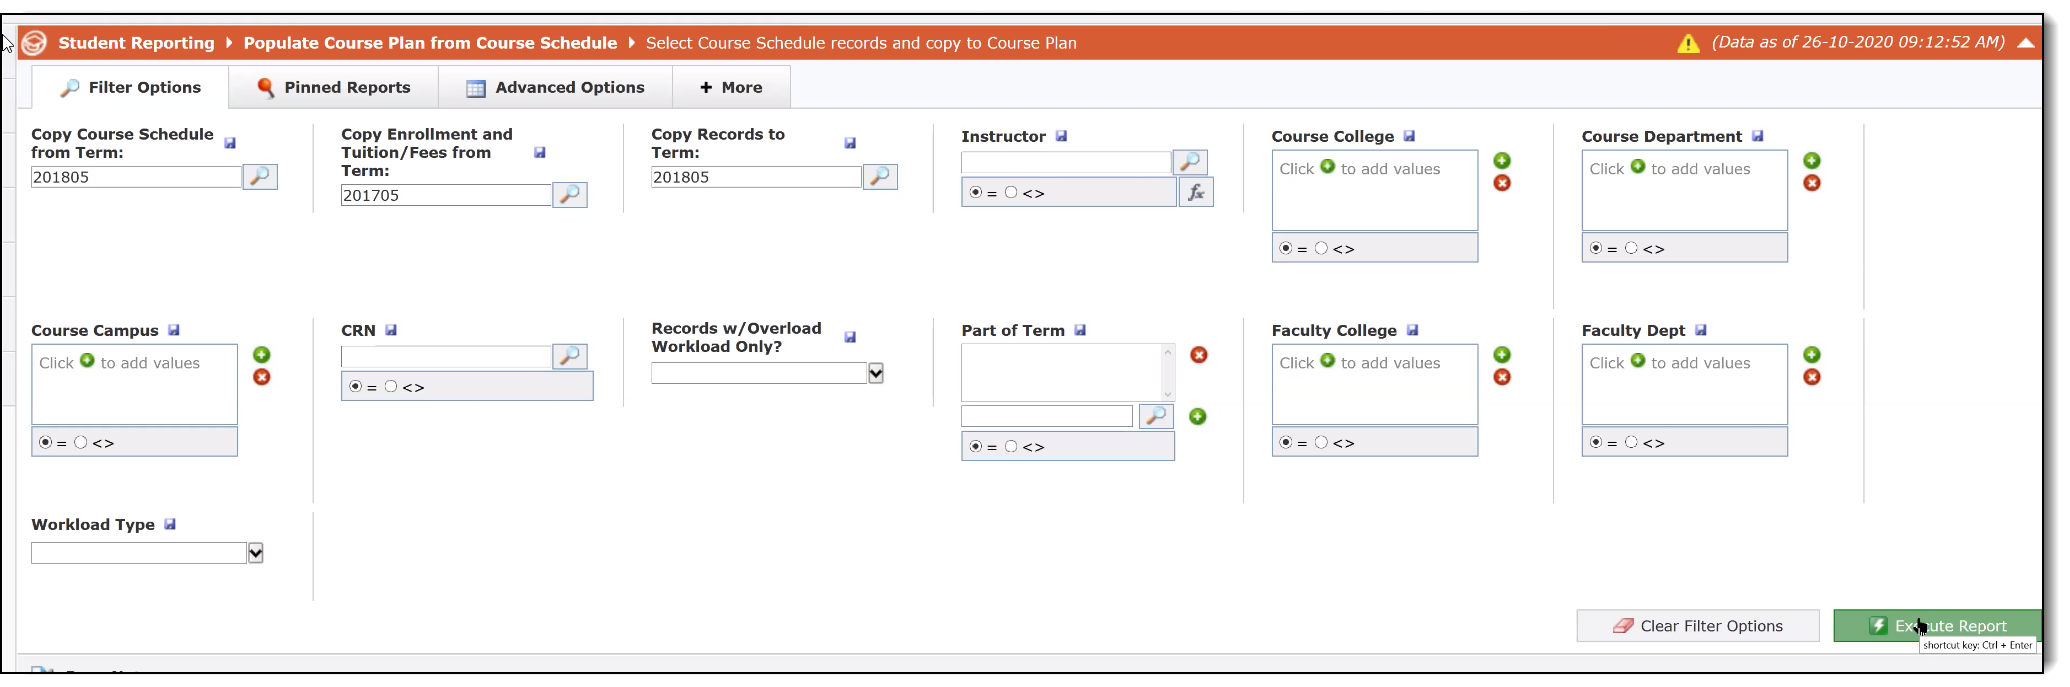
Now it is time to populate the course records within the course plan, or the actual courses you plan to offer. To populate course plans, navigate again to the Course Planning menu option and this time, select Populate Course Plan. From here there are two options: Populate Course Plan from Course Schedule, which allows for populating your plan from courses already existing within your ERP system; or Populate Course Plan from Existing Plan, which allows for using any other plans that have been created within FAST. It is also possible to use Excel to import a course schedule or plan. Selecting Populate Course Plan from Course Schedule is typically the most common and straightforward way to approach plan population.
Once this option has been selected, a filters page will open that allows for selection of records for copying into the new course plan. First, determine which term to copy the schedule from. This is typically term you are creating the course plan for. Next, choose the previous term from which to copy enrollment numbers and tuition and fees. It is recommended that you copy from the most recent like term--for example, if you are creating a course plan for Fall 2022, select Fall 2021 for enrollment and tuition/fees. Once copied, it is easy to make adjustments but a starting enrollment, tuition, and fees are needed.
Finally, select the term for which the course plan is being created. Then execute the course plan.
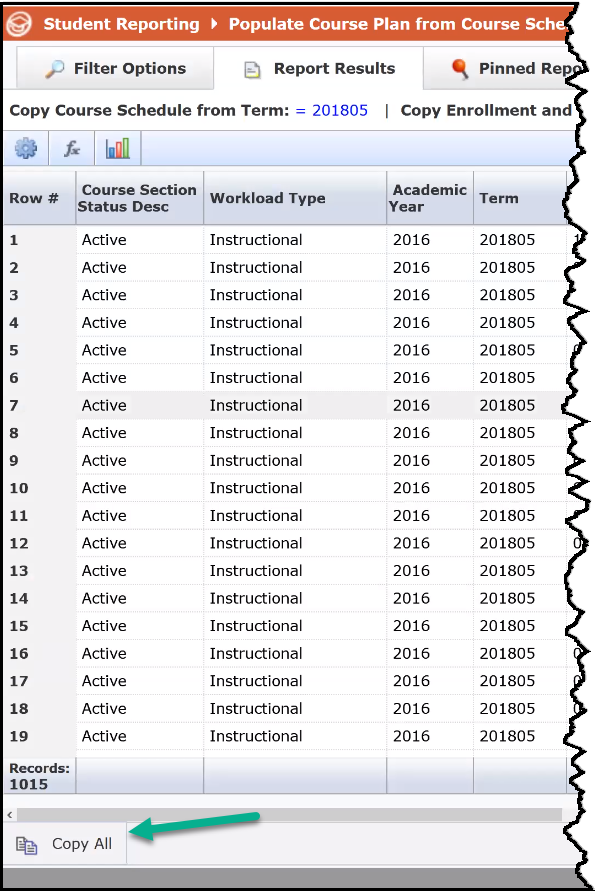
On the page that opens, select the records to copy into the course plan, or select Copy All at the bottom of the records list.
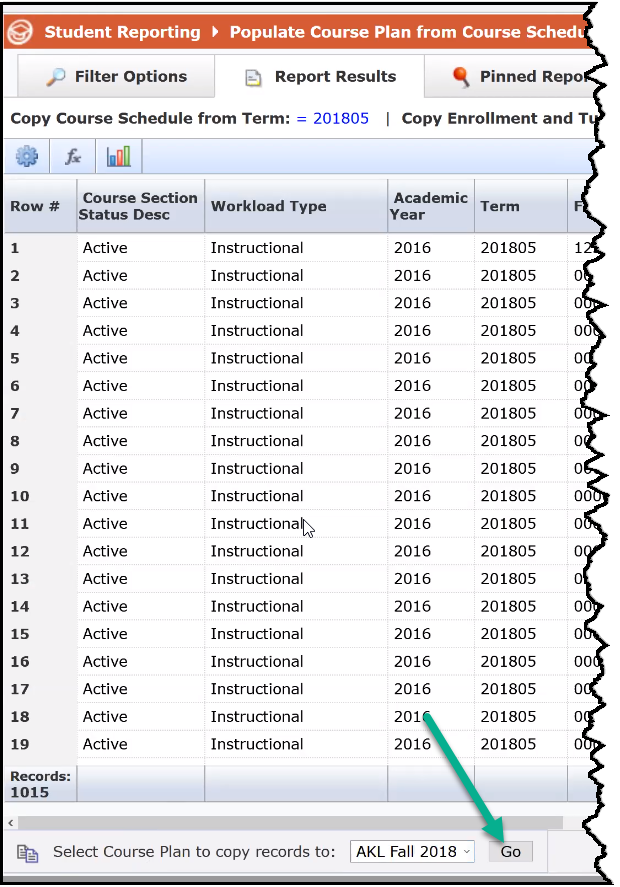
Once the records have been copied, select the course plan to copy the records to via the drop-down menu at the bottom of the records list. Hit GO.
The page that opens is called the Review and Edit Course Plans data entry page. This page provides a new course plan which is the basis for making changes and editing. For high level course planning, all that is required prior to forecasting is a list of all courses offered in the upcoming term. The subsequent report will show the prior term's schedule, estimated enrollment, tuition and fees based on prior like term, faculty, course information, etc. All of these fields can then be modified within the planning report. For example, if during the prior term a course had very low enrollment, this course can be cancelled within this report. Because the approval queues are already set up, once this course is canceled and the page has been saved, the approval queue process will be initiated.
Each report has options for drilling down to more specific or relevant data so that individual users can modify portions of the report. For example, if a department chair would like to modify only the courses in their department, they can easily filter the report and drill down to the specific courses they would like to see in order to make changes for their department only. All fields are modifiable, but it is also possible to add new courses and information in the Review and Edit Course Plans data entry page including contracts or other documentation.
When all changes have been made, click SAVE and all changes will be recorded and any approval queues will start.