Attaching an electronic file
On the Student Personal Information page, you can attach
a file to a student record. Types of files you might attach are: resumes,
certificates, and course grades. To view existing attached files, click
![]() .
.
Attach an electronic file:
On the Student Info menu, click Personal Info.
Search for a Student ID and/or Type and then click Execute Report.
Below the student picture, click Attach Additional Information
 .
.
The Document Reference is filled in automatically.
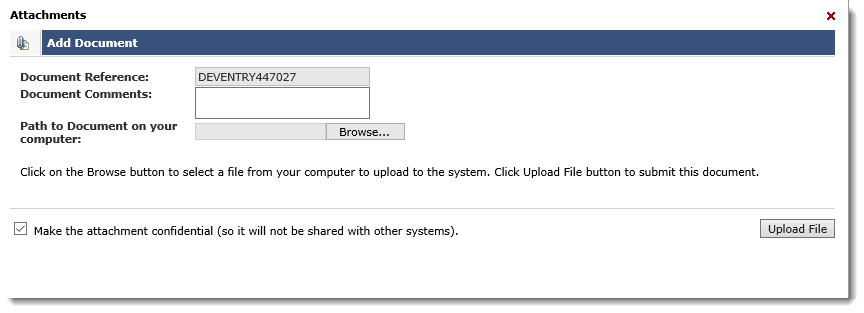
Type any Document Comments (optional).
Click Browse and select a Path to the Document on your computer.
Select the check box if you want to Make the attachment confidential. This means that it will not be shared with other FAST systems.
Click Upload File.
To add additional files to the same transaction, click
 to attach another file. They will be listed sequentially, as shown
below.
to attach another file. They will be listed sequentially, as shown
below.You can click
 to delete the attachment if you have the correct roles to do so.
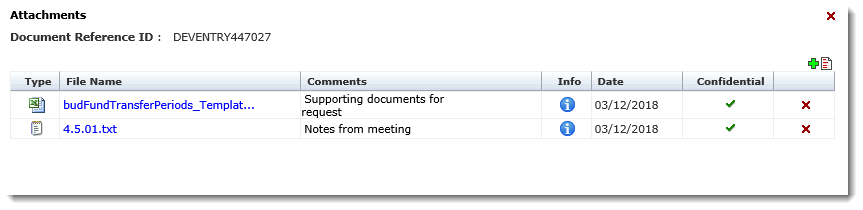
The document is added to the list.
If the File Name is very long, only the first 30 characters display.
A check mark displays if the attached file is marked as Confidential. This means that the document will not be shared with other applications.
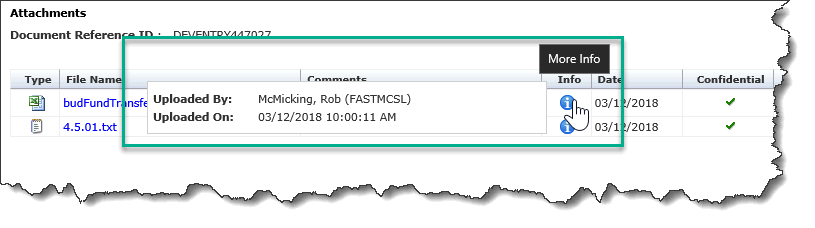
To review the upload details (including who uploaded the file and when it was added), simply hover over the Info icon, as shown:
Repeat steps 2 to 5 to attach more files.
To close the Attachments section, click Hide Attachments or Attach Additional Information.