Assigning Roles to a New Custom Reporting Page
To Assign roles to a new Custom Report
Click on the Administration Menu, then the Access menu, then select Menu Access.
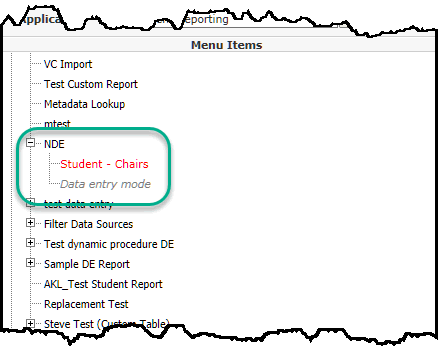
Under the Menu Items section, navigate to the report that you need to assign roles for and highlight it. The new report will be located under the menu location that you assigned it to during upload.
In the Available Roles section, locate the role that you wish to assign the report to (expand out the parent nodes if necessary):
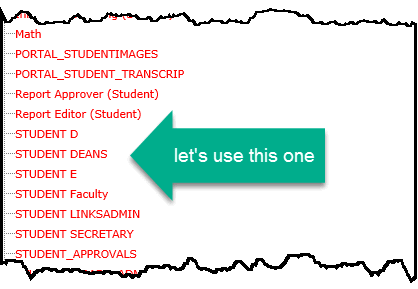
Locate the Role you would like to assign to your new custom report under the list of Available Roles:
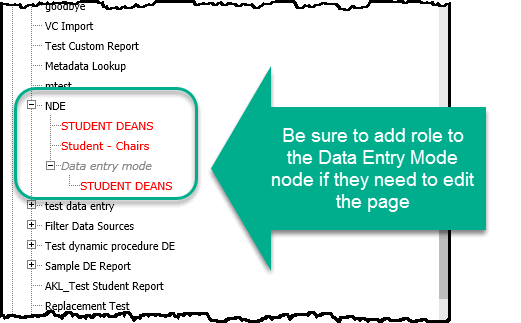
Grab the role with your mouse and drag & drop it to the menu node of your custom reporting page:
The settings are also designed to specify distinct levels of security: read-only or read/write. When assigning a security role to a menu item on the page, if that menu item (page) is a data entry grid style page, you will see a gray/italic child node called "Data Entry Mode" immediately below it:
If you wish to assign full read/write access to the page, (in the example above, for Configuration Settings), you must assign the role by dragging and dropping it, to both the "Configuration Settings" node and to the "Data entry mode" node.
NOTE: If you drag the role directly to the "Data entry mode" node, it will automatically be assigned to any parent nodes that do not already have the role assigned. In other words, it will alleviate the need to drag & drop the role more than once for this Menu Item.
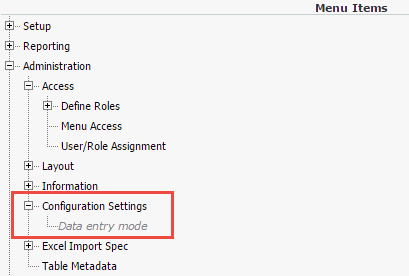
If, on the other hand, you want to assign read-only access to the page, just assign the role to the Menu Item node and not to the "Data entry mode" node. This will grant users of that role access to view the data entry page, but not make changes to the page.