Sharing Dashboards
Dashboard Security, or Sharing Dashboards relates to a function limited to certain Roles within the applications. All users are able to create Private Pinned Reports, Private Graphs and Private Dashboards. As an Administrator and/or a Dashboard Administrator, you also have the ability to Share Dashboards among Groups.
In this section we're going to explore the different levels of Administration relating to the concept of "Sharing" Dashboards and the items on each Dashboard.
To manage the privacy/security or shared roles for your Dashboards, you must be:
An Application-level Administrator, and/or
A Site Administrator, and/or
Have the Dashboard Administrator Role within your application
If you meet one or more of these conditions, you're ready to create and share Dashboards with other groups on campus.
To Create a Shared Dashboard
To Create a Group Dashboard, start by creating a new (blank) Dashboard just as you would normally. To do this, just click the next available Tab on the tabular Dashboard pane:

By default, this will auto-label as "New Dashboard" until you provide a new Dashboard Name.
You should include a Name and Description to add context and detail to your new Group Dashboard. Once this step is complete, you're ready to move on to the Sharing Options. To do this, locate and click on the Share this Dashboard Icon:

To begin sharing, you have two options:
Assigning View Access to the Dashboard; and/or
Assigning Edit Access to the Dashboard
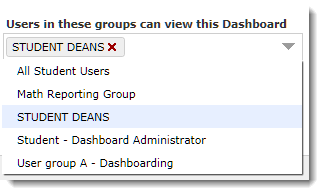
To assign View Access to the Dashboard, click the option called Users in these groups can view this Dashboard; a list of possible Groups will display. You can click one or more than one from the list:

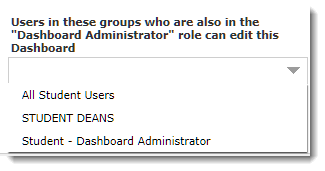
To assign Edit Access to the Dashboard (optional), click the option called Users in these groups who are also in the "Dashboard Administrator" Role can edit this Dashboard. You can click one or more from this list:

Important Note: The only groups that will display here are groups where one or more members of the group has the ability to Manage Dashboards. This is regulated by the Role called "Dashboard Administrator".
Click Save to save your settings and begin adding Graphs to your new Dashboard.
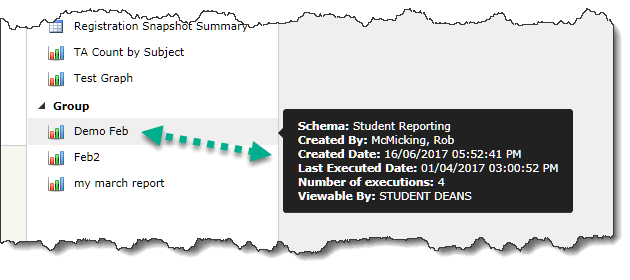
The left-hand list will display a list of the following Dashboard Items:
Graphs that have been saved to the Group assigned to this Dashboard (in this case, Graphs saved to the STUDENT DEANS group), and
All Private Graphs that belong to you
Note: Hovering your mouse over each Graph Title will provide additional information about the Graph, including the following detail:

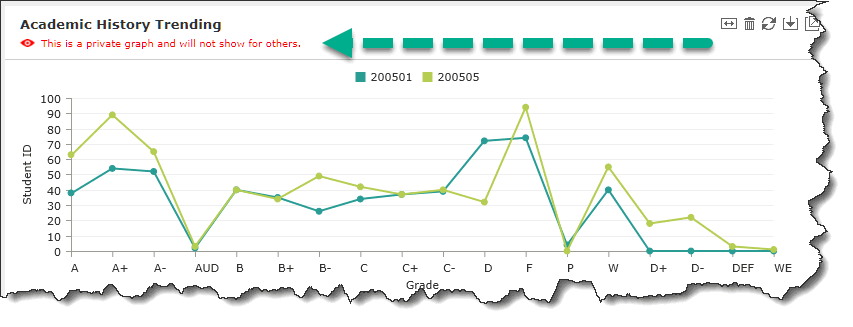
You are able to also add Private Graphs to Group Dashboards that you have access to; this might be a nice way to summarize certain items that you would like to see in one place, without the need to create a whole new (Private) Dashboard. It's important to remember that adding a Private Graph to a Group Dashboard does not mean that other members of that Group will see it. In fact, when a Graph or Grid is Private, you are the only person who can see it. When you drag and drop a Private Graph to a Group Dashboard, you will see the following message, while in Edit Mode only:

When adding Group Items to a Group Dashboard, simply drag & drop those items from the list pane to the Dashboard. FAST will auto-size the items, but you will have the chance to manage the size, position, layout and themes when you're ready.

When you're ready to review and test the Dashboard, simply click View to exit the Edit Mode. The work is auto-saved as you make edits and use the drag & drop functionality:

Additional Advanced Dashboarding Functions
To manage the Dashboard placement, Theme (Color Palette), Design and Layout, please review the section called Managing Dashboard Layout.
To add Filters to the Group Dashboard, please review the section called Adding Dashboard Filters.
To add/create Hyperlinks on the Dashboard, please review the section called Dashboard Hyperlinks.
