The Report Scheduler - Administrative
The Administrative Report Scheduler allows all those individuals who act as Site Administrators within the FAST portfolio the ability to manage and schedule Group Pinned Reports for delivery - ad-hoc or regular - to the end users in each of your designated Group Roles.
Site Administrators should be proficient in managing Group Roles prior to beginning work with the Scheduling Tools.
Access the Site Administration Application from the FAST Home Page. Within Site Administration, select the Scheduler Menu Option -> Report Scheduler from the available options. Within any of the FAST applications, select Administration -> Report Scheduler -> Event Calendar
A Filter Options page will display, allowing you to select only the Application(s) (schema) and Schedule Type(s) that you wish to view; the Application will be pre-defined if working within a specific FAST application:
The Report Scheduler page allows you to view your Admin Calendar at-a-glance. This can be viewed by work week, by calendar week or by month:
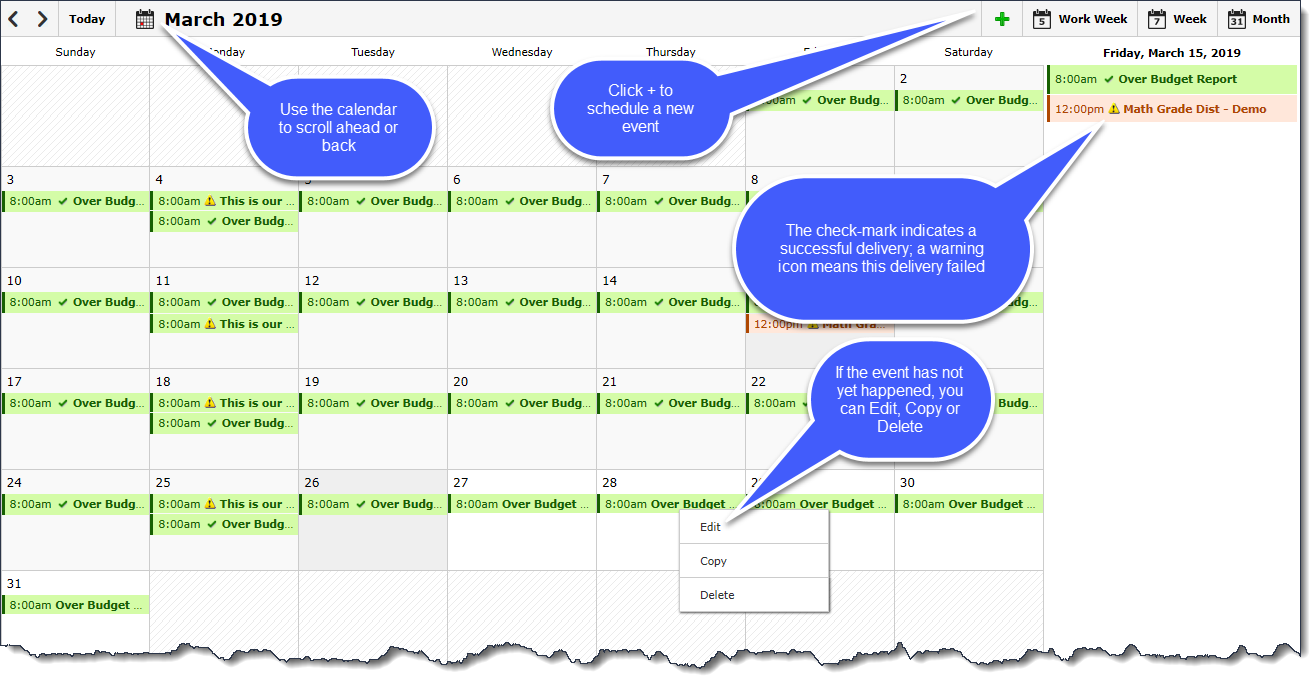
To Schedule a new report or event, select the
 to
open the admin options. The available options include all of the following:
to
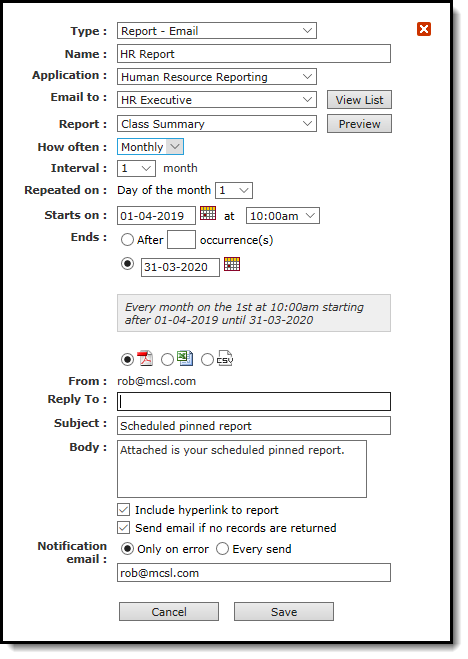
open the admin options. The available options include all of the following:Type: This can be Report, Blackout, Data Refresh, Upgrade (Use the Blackout, Data Refresh or Upgrade options to signal a "window" for your end users when reports cannot be scheduled to run). To schedule a Report, select Report.
Name: Name of the Report or Event being scheduled.
Application: Select from the drop-down list available; will include all applications for which you are an Administrator.
Email to: Includes all Group Roles within the selected application (to preview a list of recipient Emails click Email List)
Report: Select report from the available drop-down list; only Pinned Reports saved as Group Pinned Reports will be available.
How Often: Select from Once, Daily, Weekly, Monthly or Yearly.
Interval: How many occurrences per day and/or Days of the week or month.
Repeated on: Select the days of week or month to generate each schedule
Starts on: Select date from calendar and Time of Day
Ends: Select Date on calendar or After ## occurrence(s)
From: Will default as the current email assigned to your user ID based on your profile
Reply To (optional): This field allows you to specify a designated address where users can Reply To. This is optional and may not be turned on at every institution. This option is controlled at the admin level using Configuration Setting #5103.
Subject: Subject for Email
Body: Body text of Email
Select from either PDF or Excel as desired output
If you select Excel,
Notification Email: Select from "Only on error" or "Every send" and select the notification Email address.
Include hyperlink to report (optional)
Send email if no records are returned (optional)
Click Save to Complete and Schedule.
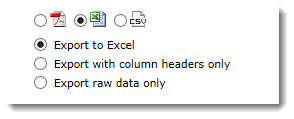
Excel Scheduler Options:
When selecting the Excel icon as your desired output option, many reports in FAST allow you to choose from a variety of output formats including:
Export to Excel (standard output)
Export with column headers only (no footers)
Export raw data only
Most commonly, the first option will be selected and this will be the system default. Note that this option is not available on all reporting pages and may not be enabled at your institution.
Once the report or event has been scheduled, you can manage your scheduled delivery from the calendar. Click on the item to either edit select labels, Copy (to copy this schedule) or delete:
If you select the Edit option, very few elements of an existing schedule can be edited once in-progress. Editable fields include titles, Subject and Body and the notification email. All other details (including scheduler frequency, output format and groups cannot be edited; to make edits to your schedule once in-progress, you would need to delete the schedule and start over.
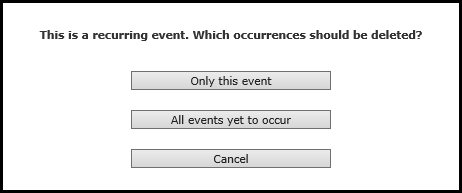
If you select the Delete option and your event is part of a recurring schedule, the page will confirm whether you wish to delete that single occurrence or all events yet to be sent on that schedule in the future.
To view additional steps and administrative functionality, proceed to:
Scheduler Items of Note:
As the Site Administrator, there are a few things to note when it comes to the Report Scheduler:
If a report is still scheduled to be sent to an individual who is no longer an active employee, or who has changed departments and no longer has access to the report, the scheduler service will simply skip over the execution of the report and nothing will be sent out to that user.
If you would like to view any failed executions of scheduled reports, you can navigate within FAST to the Administration tab --> Report Scheduler --> Recipient Detail Report. One there, you can filter on the Event Status filter option to review any failed executions.
If you would like to turn off schedules when refreshing data from your PROD environment to DEV, reach out to your database administrator. Database admins have been given documentation on how to handle cloning down environments. Note that there are three primary options that end users might prefer to use in their TEST environment and the preferred option can be communicated to the database administrator:
Delete all the schedules in the cloned environment,
Deactivate all schedules in the cloned environment, or
Turn off the scheduler service completely in the cloned environment, so no schedules will run at all.