Edit Data Entry Pages Using the Graphical Query Builder
In some cases, Administrators may want to add validation or complexity to your Custom Data Entry pages. This is best and most easily accomplished using the Graphical Query Builder.
To begin, you must already have a custom Data Entry Page created. Once your page is created, access the Manage Data Entry Pages form by selecting Queries -> Page Builder -> Manage Data Entry Pages.
From the Manage Data Entry Page, locate the Page you wish to edit and click the Edit Pencil 
This will open the Edit Report Details Page:

Select the option labelled Enter Query. This will open the Edit Query form and you can now begin edits.
PLEASE NOTE: Editing a Query can cause a report to fail; be sure you know exactly what you're doing before moving forward and if in doubt, contact the friendly folks at Customer Support for advice.
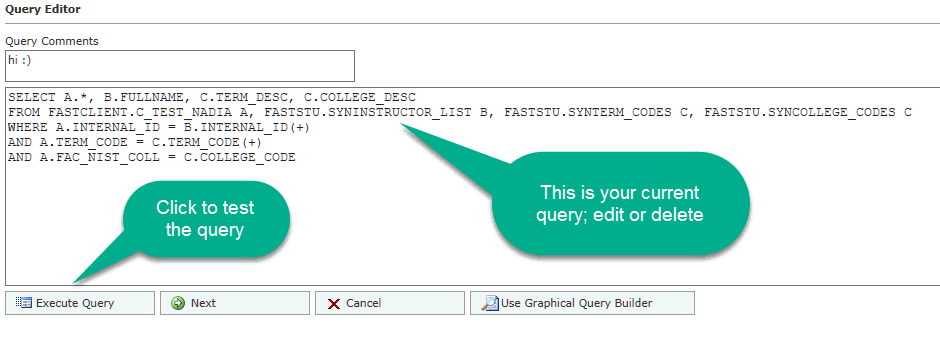
To make a basic edit to the query, simply key in your changes to the text box in the Query Editor.
To use the Graphical Query Builder, Click Use Graphical Query Builder.
PLEASE NOTE: If this query was not originally built using the Graphical Query Builder, you may have to delete the query text. Don't worry, we'll get it back! You'll know if this is the case, if the page displays the comment: Query too complex for the Graphical Query Builder.
Once the query field is blank, click Use Graphical Query Builder.
At this point, scroll through the list of Objects displayed and locate the original table and any other data objects that you wish to join.
Include or exclude any data elements in each object and be sure to include the correct Join Types for the report.
This will allow you to include additional data elements from baseline or custom tables, views or synonyms, and also allow you to create validation fields based on existing data in the table. For instance, your data entry page may include an ID field and you may choose to have the Name auto-fill based on the correct ID.
Be sure to test your new Query before saving your changes. To test it, click Execute Query. To save, click Return Query. To cancel, click Cancel.
| |