Student Follow-up Page
The Student Follow-up is designed to allow users with edit access the ability to track and assign outstanding follow-up tasks on student records.
For direct access, go to Student Info -> Student Follow up and populate the desired Filter Options before executing the report (or leave blank for all).
Alternatively, new Tasks can be generated from the Student General Info reporting page.
The form can then be used to create follow-up workflow sequences for students including details such as: Tags, Date Due, Completed indicator and which Group the task has been assigned to.
After running the report, or accessing it from the General Student Info page, you can review the current detail and/or use the data entry grid to edit the existing records or add new records.
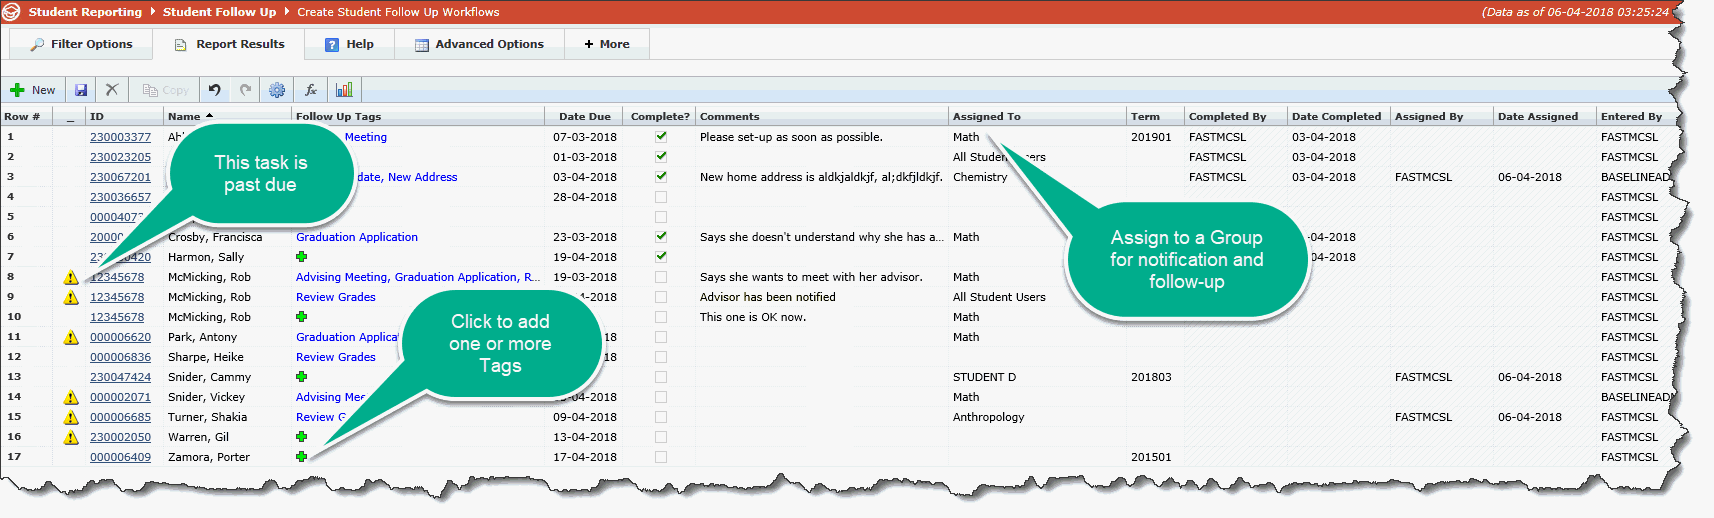
Several key areas of interest include:
At any point, you can add a new student record by clicking the + New button on the Data Entry toolbar.
If the task is preceded by a warning icon, this task is past due based on the due date entered.
You can drill down on the Student ID number to access the General Student Information Page for this student record. From there, additional workflow options have also been enabled.
You can add, remove or modify Tags using the Follow-up Tags worksheet.
Include Comments (optional).
You can make a task as complete using the check box indicator.
You can (optional) assign this task to a Group in the Student list; members of this group will be notified using the FAST Notification tool.
FAST will automatically track and log the original and most recent changes on each record.
Using Follow-up Tags:
Follow-up Tags can be added to each student record as a visual reminder of the item(s) that need to be addressed for this student.
To add a tag to a new record:
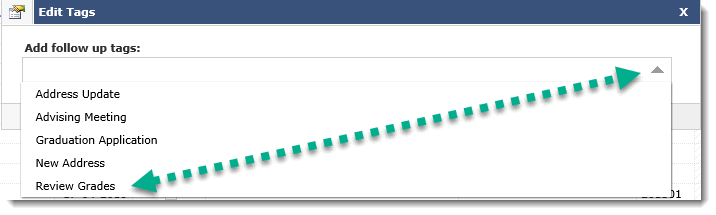
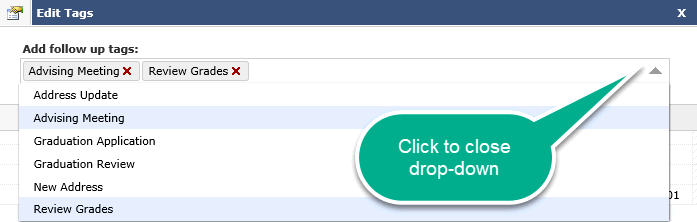
Click the green + and the Edit Tag box will appear; click the drop-down to select one or more tags from the list. Once selected, close the pop-up box and your changes will be saved automatically.
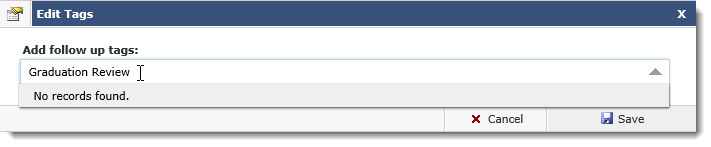
To create a new Tag for the student record:
If a suitable Tag is not found in the drop-down list, users with access can also create their own. Start by clicking the drop-down to confirm that your preferred Tag is not on the list. Once confirmed, start typing the Tag that needs to be added to the student record in the text field. An indicator of "No records found" will appear:
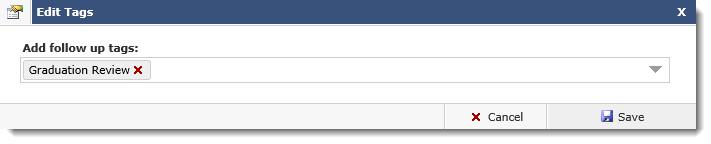
If this is correct and you wish to continue, the field will update automatically to add the tag; to confirm, click Save:
To add additional Tag, click the drop-down once again.
To add or remove additional tags on a student record:
Once you save your initial entry, a Green + button will be enabled under the Follow-up Tag column.
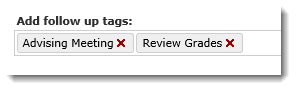
Student records that already contain tags will no longer have the green + sign in the Follow-up Tags field. Rather, they will have one or more visual Tags.
To add additional Tags, simply click the current tag field and Edit Tags box will pop-up. You can then click the drop-down to select additional tags and/or create new Tags manually:
Click Save to commit the changes.
To remove Tags, simply click the Red X next to one or all of the current tags on the student record:
Click Save to commit the changes.