Upload Selection to ERP
Using a similar concept and process as is used to create Dynamic Selections, you can also upload the data you have generated back to your ERP. This advanced function requires that Configuration Setting #250 in Site Administration is enabled and the user(s) have also been granted Menu Access to the Dynamic Selection menu node. This function is generally restricted to a small number of centralized power-users.
The end users will also need to have INSERT, DELETE and SELECT privileges to be successful. If this is a function that your institution requires, please contact our Technical Support team to have it enabled before you begin.
Provided the above criteria is met, there are three distinct ways to use this function.
Method 1:
Execute a FAST report.
Click the Dynamic Selection Function key on the reporting toolbar:

The following options will display:

Click Upload.
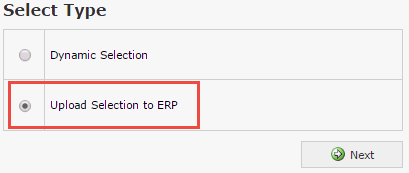
FAST will automatically move you to the Dynamic Selection Import Wizard and select the Upload Selection to ERP option; Click Next to proceed.
Enter the details to map the selection correctly. This includes:
Report Column: identify the column in the report you executed are you trying to capture to use and upload;
Application: Select the FAST Application from the drop-down list;
Selection: These are the selections that have been created in your ERP to import the data to;
Click Create;
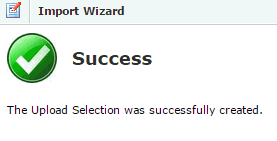
If successful, the Import Wizard will notify you that the Upload Selection was successfully created;
Move into your ERP to review the imported data.
Method 2:
On any FAST reporting page where Dynamic Selections are enabled, click the Dynamic Selection Function key:

Click Manage;
There is an Upload Column and Icon on the Manage Tab for selections that you have access to;
Click Upload and FAST will automatically move you to the Dynamic Selection Import Wizard;
Repeat steps 5 through 7 from Method 1 to proceed to Upload the Selection to your ERP.
Method 3:
Directly from your Dynamic Selections Page, Click
 = ADD NEW
When you reach Step 1 of the Upload Wizard, select Upload Selection to ERP, then click Next.

You must then choose to import from an Excel File or from a Custom Query. Select one or the other depending on what dataset you wish to upload back to your ERP. The data can be generated from a FAST Report, an external Excel spreadsheet, or a FAST custom query.

Follow the instructions based on your selection. For an Excel import, first select the destination file from your computer or network drive and be sure to map to the correct worksheet if your spreadsheet contains multiple TABS. You must also map the Report Column, the Application (schema) and the Selection (Selection may default in based on your choice of Queries). One all steps are complete, click Import. For a custom query, simply select the query from the available queries in the drop-down menu.
Map the Report Column, the Application (schema) and the Selection (Selection may default in based on your choice of Queries and is based on the selection created in your ERP).
Click Create.
An Import Wizard notification will let you know if the Upload Selection was successful with the following indicator:

