Dynamic Selections
Dynamic selections is a convenient way of applying a list of values (e.g. Set list of ID's) to be used as a filter in a report.
Data imported from a spreadsheet or created from a query can be used to create a dynamic selection. The import process uses a Wizard to select the column data, match the column to a filter, and give it a name. If you are using a spreadsheet exported from a FAST reporting page, you need to delete some rows before starting. For each type of import, Step one of the wizard is slightly different; refer to the section below for the option you are using.
You can use dynamic selections to create and load data from either query builder, Excel or Pinned reports into a dynamic filter (if the filter is set-up to pull in a dynamic selection).
The Dynamic Selection icon is also used to denote Function-based filters which are algorithm based rather than user defined.
Without leaving the Report Results tab, a Dynamic Selection can now be added with two clicks. No additional data entry is required, and the selection will automatically expire and disappear the following day.
Dynamic Selections created this way will be available on all filter option fields without the user needing to specify which field(s) the Dynamic Selection is for.
To Create a Dynamic Selection from your Report Results:
Execute a report with whatever filter options you need to generate the desired results.
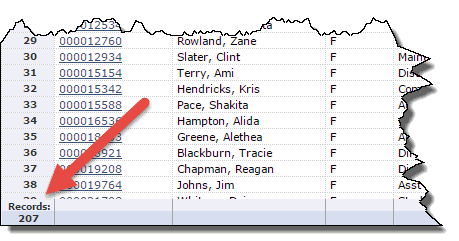
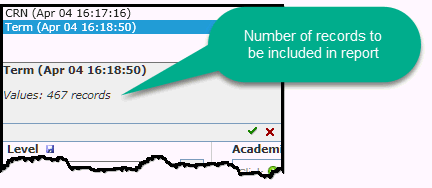
On the lower left hand portion of the Report Results Tab, you will see a count total that displays the number of records that will be included in your Dynamic Selection:
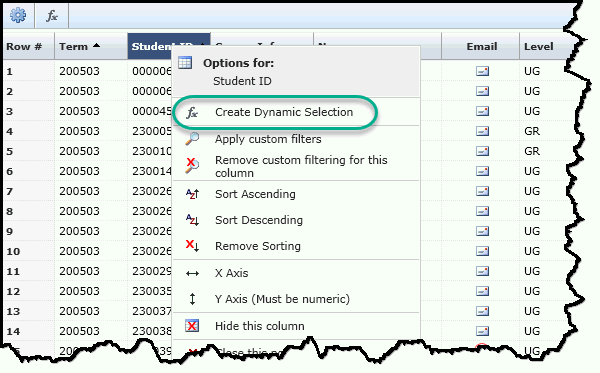
From this page, you can create a Pinned Report or you can create a Dynamic Selection. At the column header level, click the title and open the context (column level) menu; select Dynamic Selection from the drop-down options:
The Dynamic Selection dialogue box will pop up allowing you to customize your selection:
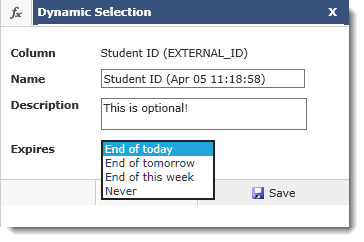
If you want to customize the name/description/expiry date you can do this as well from the dialogue box. The default expiry date is "End of Today" which creates an "adhoc" selection that will not be saved beyond the current business day. If you do not customize the Name, be sure to make a note of the pre-assigned Name in the text box. You will need this for the next step. If you wish to Share this Dynamic Selection, you must select "Never" from the drop-down.
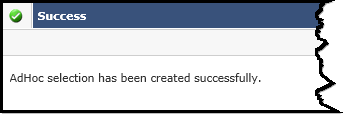
Click Save to create. A message will display indicating that your AdHoc Selection has been created successfully.
You are now ready to run/apply this selection against any other FAST report!
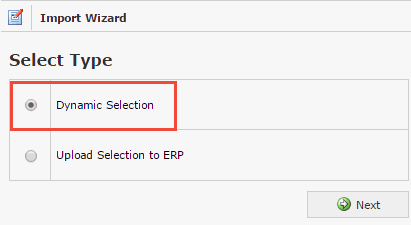
To Create a Dynamic Selection using an Excel Spreadsheet or a Custom Query Import:
NOTE: This is generally reserved as an Admin level function and, depending on your configuration and role-assignment, will not be available to end users.
From the Queries menu click Dynamic Selection. (please note that in some applications this may have been moved to the Administration Tab). You will see a list of all the current dynamic selections, click
 ADD NEW to add or import a new selection.

Select Dynamic Selection Click Next:
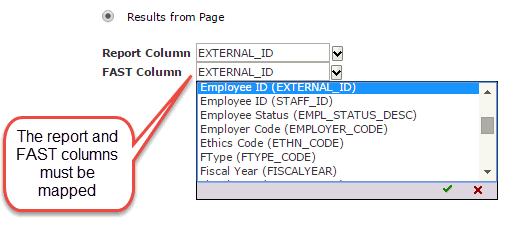
You can Import from an Excel file (browse computer or network drives). You must map the Report Column with a corresponding field/column in FAST (e.g. External ID -> EXTERNAL_ID).
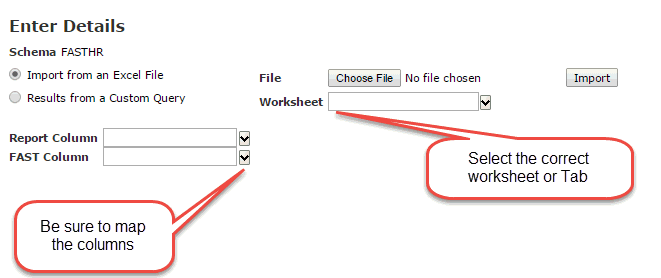
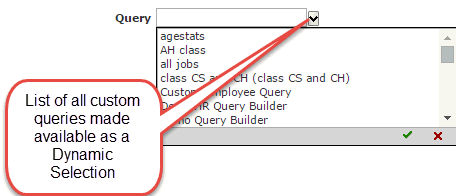
Or you can Import from a Custom Query:
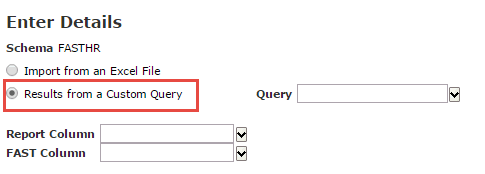
If you have created a custom query and have saved it to Dynamic Selections, this query will also now be available to you to choose from in the Wizard.
Give the Dynamic Selection a Title and a Description:
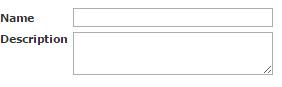
Note: It is very helpful to include descriptions that give context to the selection. As the library of entries grows, it becomes more important to define and label your entries clearly.
Click CREATE
 and
a success notification will let you know that the Dynamic Selection
was successfully created.
and
a success notification will let you know that the Dynamic Selection
was successfully created.
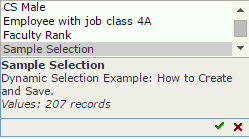
The Dynamic selection is now saved and can be used within the application and will appear in the application field that has been mapped wherever that filter option is available. In the example above, we saved a Dynamic Selection called Sample Selection and mapped the fields of External ID to the FAST column of External ID. Now running any baseline reports within the application, wherever External or Employee ID is available as a filter option, the Dynamic Selection of "Sample Selection" will be available using the Function Key
 .
.When you select it (below), you will see immediately the number of records selected in the query. In this case, we created a selection of 207 unique records. These can now be applied to our query and used to execute the report.
How to Use a Dynamic Selection Filter:
You are now ready to run/apply this Selection against any other FAST report!
Locate any other FAST Report that you wish to now apply this selection of records against. In other words, you have captured a record set and temporarily saved it; what else do you want to know about that selection of records?
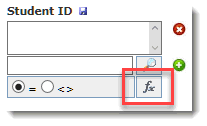
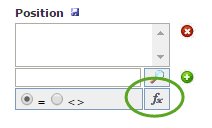
Locate the Filter Option control that you would like to use (notice the function-based filter buttons on each filter control):
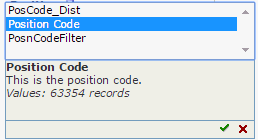
Click the function-based filter button to reveal all current selections available for you to select from. Note: these will display your (private) selections only and cannot be shared with other users. Clicking on any selection will display the description (optional) in the text box as well as a record count for this selection. In other words, if you choose this Dynamic Selection, this displays the count of how many records will be pulled into the query. To choose the current selection, simply click the green check mark or double-click the selection.
Click the dynamic selections icon
related
to the selections. The list of selections opens.
Click the dynamic selections you want to use. The values for that selections open.
Click to
 use the dynamic selection
to execute your query.
use the dynamic selection
to execute your query.
NOTE: Unless you choose to SHARE this Dynamic Selection, it will be available for your User ID only. Sharing Dynamic Selections is a role-based function in most institutions.