How to Send SMS from a Reporting Page
SMS messages can be sent from any FAST reporting page where the SMS functionality has been added and where the Communication Centre is enabled. At a glance, to see if your report has SMS enabled, execute the FAST report and look to the lower right-hand corner of the page. If SMS is enabled, you will see a Communication button (rather than Email only):
If the Communication Centre is not enabled, you can:
-
Email Customer Support to have it added to FAST Foundation reports
-
Use the Hyperlinks Tab to add it to your institution's custom reporting pages, using the Communication/SMS function
To send a message to the ID's on the report
You can send out an SMS text message (referred to as "mass texting") to the ID's generated on the report (this is usually going to be either a list of Students or a list of Employees), quickly and easily using the SMS option in the Communication Centre.
The list of ID's that are generated at the report level constitute your "recipient list" and the ID's are linked (via External_ID or Internal_ID) to the person record in your ERP or database.
-
Execute the report and review the results
-
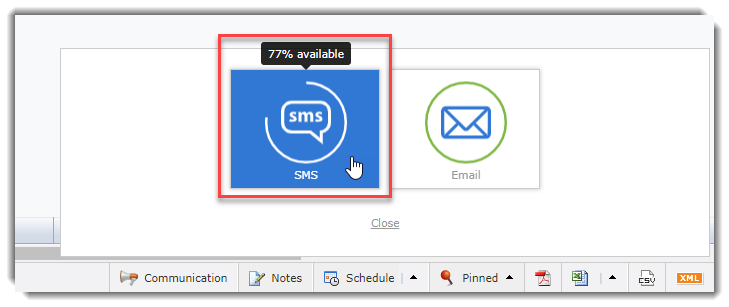
Click on the Communication button; the Communication Centre options will pop-up on the page:
-
Select SMS or Email (TIP: hovering your cursor over the SMS and Email buttons will let you know what percentage of availability currently exists based on your database. In this example, I have 77% availability for SMS; and 100% availability for Email.
-
Click the SMS icon and the Control will open. This is where you can customize your message. The message can be the same for all recipients (generic) or you can also include one or more values from the report datagrid to include in your message to customize the text sent to each recipient. To add fields to each message from the report values, click the + Field button to select.
-
For a basic text message, select the Pool using the drop-down in the "from" field. In some cases, end users may only have one option here and this is based on the Pool Administration and which Pool(s) have been assigned to each Role that the end user belongs to. The list of Pools at the reporting page level is restricted to Pools in that FAST application (or schema) only.
-
Key in your message, keeping your institutional and system limits in mind (these may be different for each institution, please contact Customer Support for more information).
-
You may also choose to enable an "Alternate" method of communication. This is used in situations where a student or employee may not have an active SMS or mobile number, but may have an active Email address. To use the Alternate, change the default "None" to SMS. This will prompt the Email message box to pop-up.
-
-
If using Email as an alternate, key in or copy/paste the text into the Message field (this will NOT auto-fill based on your SMS message details; in many cases an email may contain more detail and more characters as there are no limits as when using SMS).
-
Include an address in the "cc" field (optional)
-
If using email, you can also include a "Reply to" field (optional) where, should end users choose to respond to the email, is where response emails would be sent/received.
-
Include attachments (optional) such as images or other attachments. Up to 10 are permitted per email. Use the + key to add additional fields. Click the Browse button to locate the attachment/file on your computer.
-
-
Verify the details of the SMS and Email:
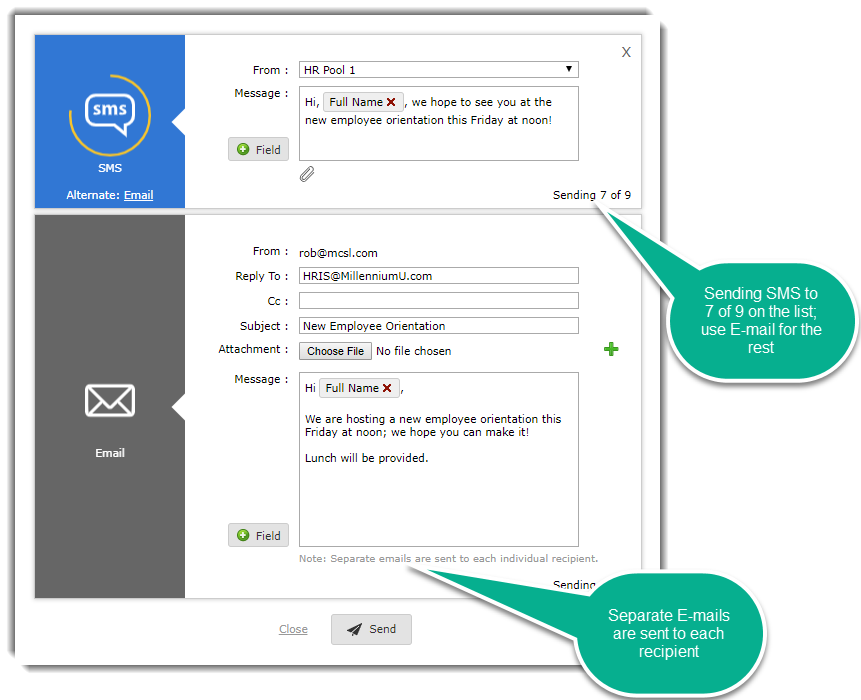
Click Send when you're ready.
Each message is sent individually.
Including attachments or images in the SMS
The permitted file types for SMS are JPEG, GIF and PNG only.
Only one file may be sent with each outgoing message.
To add an image, click the paper clip icon to search your computer to locate the file source.
If successful, the file will automatically be inserted into the message and included when you click Send.
Sending SMS to less than the full group
In some cases you may not want to send a message to the entire list generated on the reporting page, but you may want to send a single SMS to someone on the page. This is known as direct 2-way SMS but can conveniently be done right from the reporting page, without having to even touch your SMS pop-up.
If there is an employee or a student you'd like to send a direct message to, and there is a Phone or SMS or Mobile icon on the page, simply click it to open the direct SMS communication tool with that employee or student.
Type your message into the text box and click Send.
Once your first SMS is sent to a student or employee from the Pool, an auto-generated message will automatically be appended and sent out instructing the recipient on how they can get help or unsubscribe (opt out) from further text messages.
The options are:
-
HELP: Get generic help on the messaging system;
-
STOP: Stop receiving communications via SMS from this list;
-
STOPALL: Stop receiving communications via SMS from all lists;
-
START (not listed): Resume receiving SMS from all lists after a STOP or STOPALL has been submitted; there is no "START" at the individual Pool level, a START means to unblock the institution as a whole.
This method opens the lines of communication, one-on-one, with that student or employee and is retrievable by anyone with access to that Pool.
There are also several additional functions, referred to as Advanced SMS Options that are only available if the end user has "Admin Access" to the Pool. These functions are not available for end users with Role Access only.